Need help assembling ATTICCO furniture, or can not find the assembly instructions? No problems! Below you will find assembly instructions and other documents of all our products.
You can download the assembly instructions directly to your computer or smartphone.
Order when assemblying
NOTE!
If the furniture is to be moved, it must be emptied beforehand,
the top plate must be removed and each corpus must be separated.
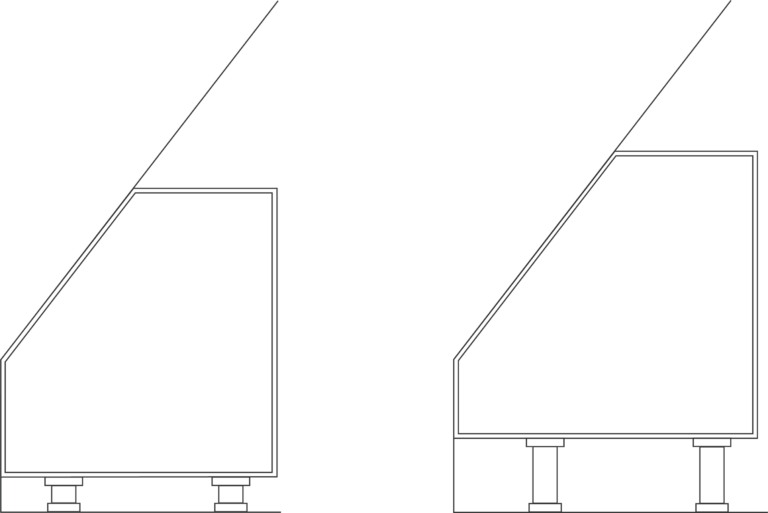
Freestanding and Built-in
Drawer, Cabinet and Bookcase
Corpus dimensions - Low
Covers the following:
Freestanding and Built-in
Drawer, Cabinet and Bookcase
Corpus dimensions - Mini
Covers the following:
Freestanding and Built-in
Drawer, Cabinet and Bookcase
Other documents
Position of plinth foot
Covers the following:
Freestanding
General advice for installation
Covers the following:
Built-in
Freestanding furniture - tip -
Furniture terms
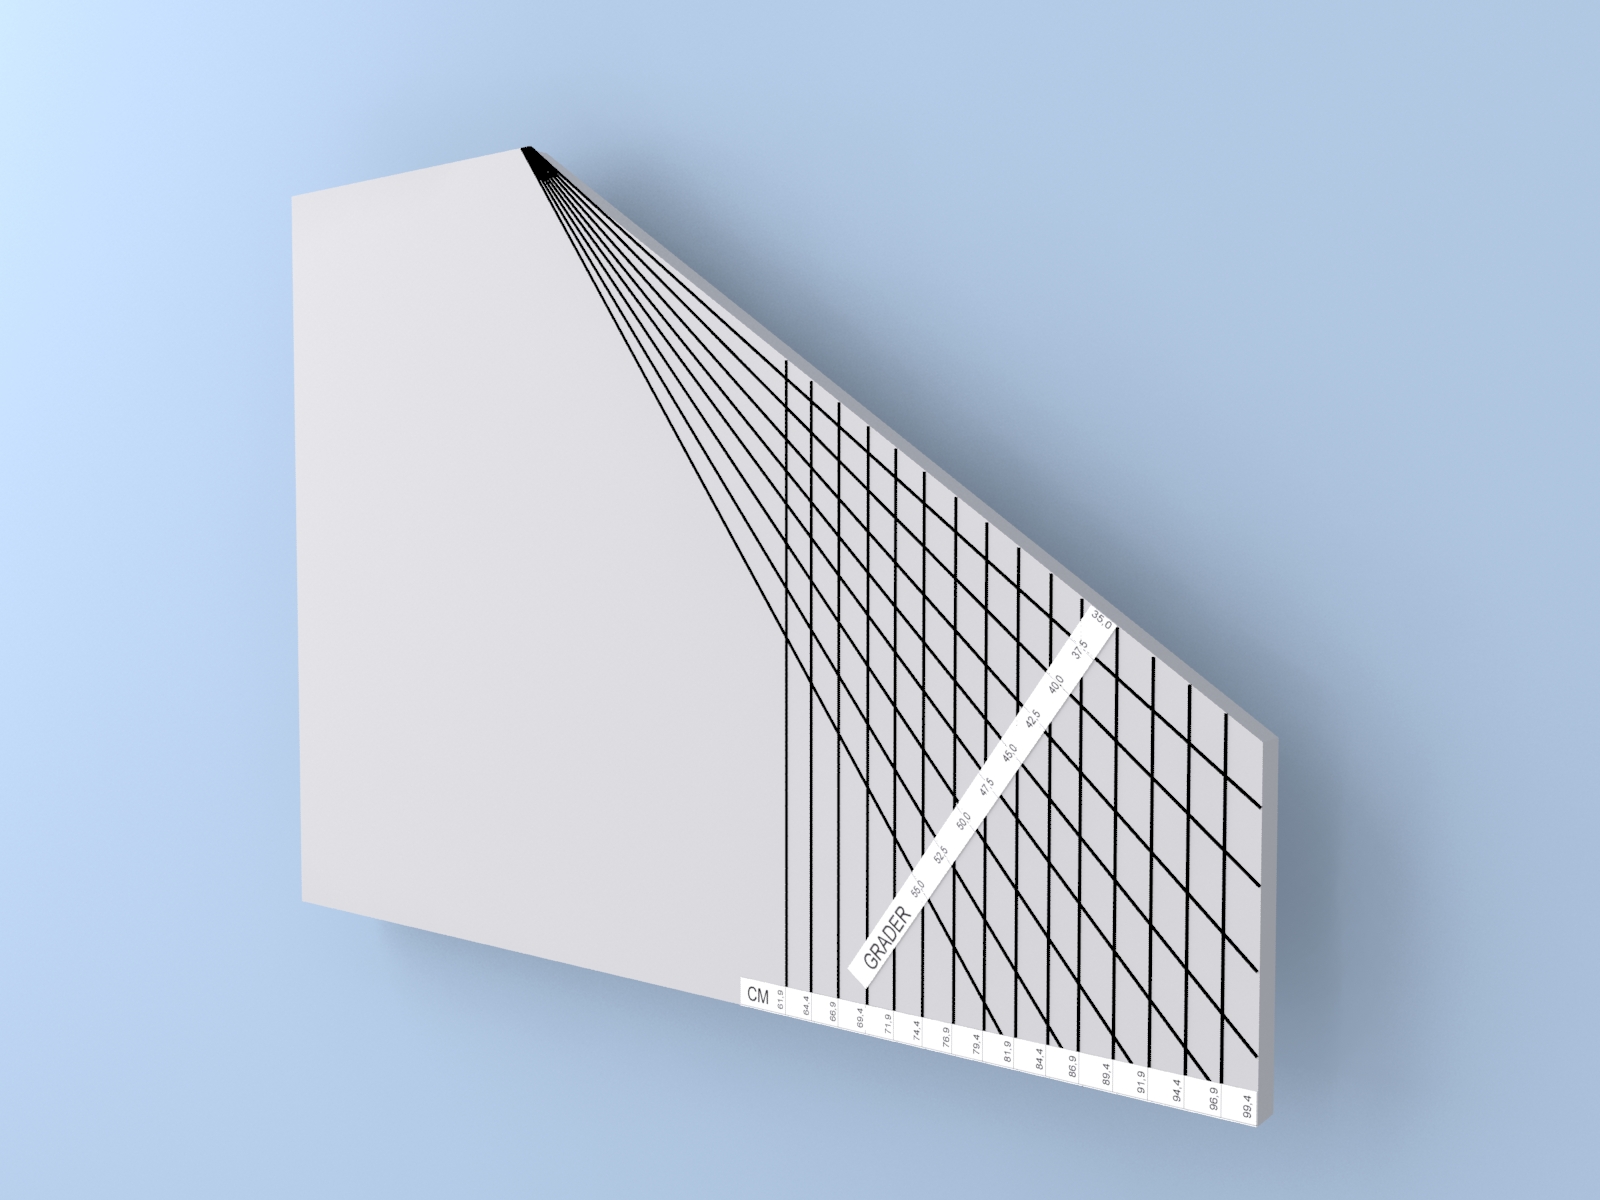
A free-standing piece of furniture can usually be assembled with several alternative furniture terms in terms of the variable furniture legs (in height) and the flexible side panels (in depth and angle).
The height of the furniture legs has a direct influence on the depth of the furniture. If the height of the furniture legs is increased, the furniture will be pushed up and out. The inner body remains the same regardless of leg height and furniture depth.
Your options for changing furniture expressions appear from the form that is presented when you have used the calculation algorithm and your furniture solutions are presented with a picture.
The table shows the combinations of leg height and furniture depth that provide perfect adaptation to skunk and sloping wall.
You can wait until the assembly of furniture – decide on the combination in the form you want to use.
Low furniture legs
Low furniture legs, means low furniture and reduced furniture depth = The furniture is less visible and takes up less space.
High furniture legs
High furniture legs, means that the furniture has greater depth = There is easier access to the furniture’s shelves and drawers.
Full flexibility!
See how a free-standing piece of furniture can be assembled with completely different furniture expressions in the form of furniture depth and furniture height.
On the back of the side panels of the cladding system, we have prepared the furniture for fitting using a number of breaking lines.
The breaking lines ensure you an easy and safe adjustment without the use of special tools or requirements for craftsmanship.
With an ordinary. sharp hobby knife you can pre-cut the flexible side plates.
Adjustment and application of edging
The side panels of the furniture are adapted to the current sloping wall and skunk. After adjustment, there may still be a smaller wedge ml. furniture and rear wall – maximum 24 mm, as the prepared grooves of the side panels jump by 2½ degrees.
This smaller gap is removed with 1 of the 2 supplied edge bands (15 and 45 mm), which are delivered in the same color as the side plate. The ribbon can be shortened with an ordinary knife or scissors.
After shortening the edging, this can be mounted on the side plate, after which there is a perfect fit to your back wall from top to bottom – quite simply.
15 mm
Attached edging
Ensures a 100% straight finish of the side plate against the wall
45 mm
Attached edging
Ensures that a possible wedge closes off against sloping wall
Built-in furniture - tip -
Furniture terms
In the calculation algorithm for built-in furniture, a furniture placement of 3 cm above floor height is assumed. If you want a different height if you want to take a foot panel into account, for example:
Want a lower plinth
A lower plinth is always possible for ATTICCO as a bookcase. As a drawer and cupboard furniture, a minimum of 2 cm plinth is recommended for opening the drawer and door.
Want a higher plinth
If you want a plinth higher than 3 cm, you must make an extra check via the calculation algorithm. Enter in the calculation algorithm a new skunk height, where you have deducted the number of cm you want to increase the base by (above the base of 3 cm).
Read more about installation under the item guides, where a number of general tips for installing ATTICCO have been compiled.
Example
If the actual skunk height is 120 cm and you want a base of 18 cm, enter a new “theoretical” skunk height of 105 cm in the calculation algorithm, which is obtained by subtracting 15 cm (18 – 3) from the 120 cm which is the actual skunk height . New skunk height and oblique angle are entered. The model then calculates whether there is room for this plinth height.
As the Statens Bygningsregelementet (DENMARK) is updated regularly, reference is made to this, to ensure that you always get the most up-to-date information and requirements when installing furniture in the skunk.
In general, the requirements for installation are tightened in height and for installation in residential apartments.
For 2-storey dwellings, there are requirements for class 2 cladding – for dwellings where the floor is not more than 5 m above ground – which applies to the vast majority of private family homes. Class 2 cladding must, for a certain period of time, set at 10 minutes, be able to protect combustible material behind the cladding and prevent the occurrence of fire in the cavities that may also occur behind it.
MDF in 12 mm meets the requirements for Class 2 cladding. At ATTICCO, we use 15 mm MDF, which is why the requirement is also met. But ATTICCO also has a 3 mm HDF board that finishes the sloping surface of the furniture. This plate does not meet the Class 2 requirement.
If the furniture is a cupboard or drawer unit, it has a 15 mm MDF surface in the front as a door or drawer front – but it is uncertain whether the fire authorities will think it is satisfactory in terms of fire safety.
You can therefore choose to mount an MDF board at least 12 mm or a 10 mm gypsum board over the HDF board and thereby ensure a full fulfillment of the class 2 requirement. Another option is to maintain the home’s existing “fire wall” by moving it backwards in the room where the furniture is built in. This will make the furniture function as a free-standing piece of furniture.
In conclusion, it must be repeated that ATTICCO, as a built-in piece of furniture, presupposes that there is a warm, insulated rear wall behind the piece of furniture. This back wall will typically live up to the fire requirements.
NOTE!
ATTICCO furniture for installation is delivered without furniture legs, as you usually establish a plinth. If you still want to use our furniture legs, they must be purchased separately. You buy furniture legs via the menu “Shop”.